Getting started with Arduino is one of the easiest ways to learn electronics and programming at the same time. This guide walks you through what Arduino is, which board to buy as a beginner, how to install the Arduino IDE, and how to upload your very first program. By the end you will have a working Blink sketch running on your board and a clear idea of what to build next.
What Is Arduino?
Arduino is an open source electronics platform used to create interactive projects using simple hardware and code. It is commonly used by beginners to learn electronics and programming, as well as by hobbyists and engineers to prototype ideas quickly.
An Arduino microcontroller development board can read inputs such as button presses, sensor data or signals from other devices and turn them into outputs.
These outputs can include lighting an LED, moving a motor, or sending data to a screen.
The Arduino ecosystem is popular because it is affordable, beginner friendly and supported by a huge community. There are thousands of tutorials and projects available which makes learning much easier for first time users.

What You Need to Get Started
Getting started with Arduino is simple and affordable. You can begin with just a single board, a USB cable and a computer.
- An Arduino board of your choice - see our board comparison below to help you pick one that suits your project
- A USB cable to connect the board to your computer (the connector type depends on your board, most use USB-B or USB-C)
- A computer running Windows, macOS or Linux
- The Arduino IDE software, which is free to download
Instead of buying parts individually, many beginners prefer Arduino and ESP32 starter kits, which generally include a breadboard, jumper wires, resistors, LEDs, sensors and step-by-step learning material so you can start building immediately without hunting for extra components.

Choosing the Right Arduino Board
With so many different boards available, choosing your first Arduino can feel overwhelming, but for beginners, we've narrowed down the best options to the following three.

Arduino Uno
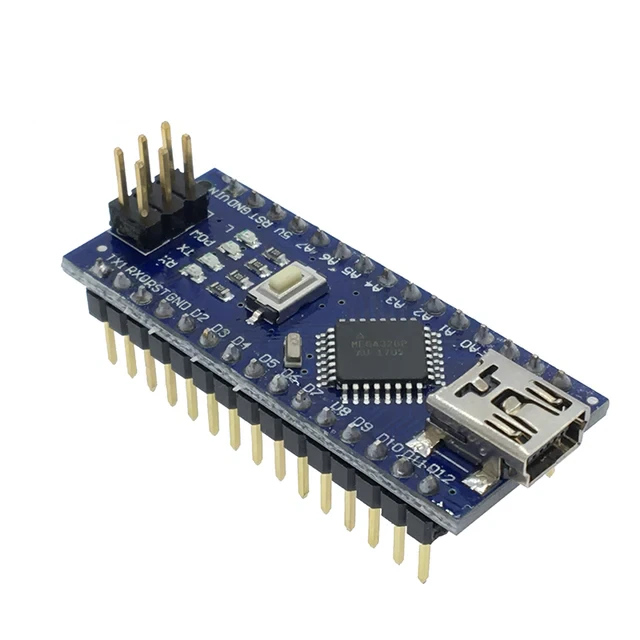
Arduino Nano

Arduino Mega
For beginners, the Arduino Uno is the best place to start. It is widely supported, easy to use, and compatible with almost every beginner tutorial you will find online. You can pick up a compatible Arduino Uno if you want the most affordable option, or an official Arduino Uno R3 if you prefer genuine Arduino hardware. Both run the same code and work with the same tutorials. We've still included the following comparison in case your future project has space or complexity requirements.
| Board | Best For | Why Choose It |
|---|---|---|
| Arduino Uno | Beginners | Most tutorials are written for this board. Easy to use, reliable, and perfect for learning the basics. |
| Arduino Nano | Compact projects | Small size makes it ideal for tight spaces and permanent builds. |
| Arduino Mega | Large projects | Extra pins and memory for advanced builds with lots of sensors or displays. |
Once you have outgrown the Uno R3, the newer Arduino Uno R4 Minima and Arduino Uno R4 WiFi are worth a look. They keep the same Uno form factor and pinout but add a faster 32-bit processor, more memory, and the WiFi version adds built-in wireless connectivity. They are a natural next step once you are comfortable with the basics on a standard Uno.
Boards such as ESP32 and Raspberry Pi are extremely powerful, but they introduce extra complexity such as wireless configuration, different development environments, or full operating systems. For most beginners, it's best to master the basics with an Arduino Uno before moving on to these platforms.
Installing the Arduino IDE
The Arduino IDE is the software used to write, upload and manage code on your Arduino board. It runs on Windows, macOS and Linux and is free to download from the official Arduino website.
Download and install the Arduino IDE from the official Arduino website.
After installing the IDE, connect your Arduino board to your computer using a USB cable. Once connected, you must select the correct board and communication port so the IDE knows where to upload your code. We'll be using an Arduino Uno as an example in the screenshots below, but the process is the same for any board - just select your specific model from the list.
- Connect your Arduino board to your computer.
- Select your board model from the Tools → Board menu.
- Select the correct port from the Tools → Port menu.
- Upload your first sketch using the Upload button.

Select the Arduino Uno board

Select the correct COM port

Click the Upload button
If your board does not appear in the port list, it is usually caused by a missing driver, a faulty USB cable, or the wrong board being selected. These issues are common and easy to fix.
To test your setup and upload your first program, follow our step-by-step guide: How to Blink an LED with Arduino.
Understanding the Arduino Board
Before writing any code, it helps to understand the main parts of your Arduino board. Knowing what each section does will make wiring, troubleshooting and expanding your projects much easier as you learn. We'll be using an Arduino Uno as an example, but most of the following concepts are shared between all Arduino boards.
Most beginner boards follow the same basic layout. While the position of components may change slightly between models, their purpose remains the same.
Anatomy of an Arduino Board

- Microcontroller - This is the brain of the Arduino. It runs the programs you upload and controls everything connected to the board.
- USB Port - Used to connect your Arduino to your computer for uploading code and supplying power.
- USB-to-Serial Chip - Translates data between your computer and the microcontroller so sketches can be uploaded.
- Digital Pins - These pins work with digital signals (ON/OFF or HIGH/LOW) and are commonly used for buttons, LEDs and simple outputs.
- Analog Pins - Used to read varying voltage levels such as from sensors. Values are read on a scale from 0 to 1023.
- 5V / 3.3V Pins - Provide power to external components like sensors and displays.
- GND (Ground) - The reference point for voltage in your circuit. Every project needs at least one ground connection.
- VIN - Allows the board to be powered from an external power supply instead of USB.
Arduino Uno R3 Pinout

This pinout is purely an example using the Arduino Uno R3 - the exact layout will differ depending on which board you're using. It's still worth familiarising yourself with, as most boards follow a similar pattern and this will help you wire up your own board with confidence.
You don't need to memorise every pin right away. Most beginner projects only use a few connections, and tutorials clearly show exactly which pins to use for each project.
How Arduino Code Works
Arduino programs are called sketches. A sketch is a simple text file written in a C and C++ based language that tells the board what to do.
Every Arduino sketch contains two main parts. The setup function runs once when the board starts. The loop function runs continuously after setup finishes.
- The setup function is used to configure pins and start libraries
- The loop function contains the main behaviour of your program
When you click upload in the Arduino IDE the code is compiled and sent to the board. Once uploaded the program runs automatically even when the board is disconnected from the computer.
Libraries are used to simplify working with hardware like sensors displays and motors. They provide ready made functions so you do not need to write everything from scratch.
Your First Program: Blink
The first program most beginners run on an Arduino is called Blink. This simple example turns an LED on and off repeatedly and is included with the Arduino IDE.
Blink is important because it confirms three things:
- Your Arduino board is connected correctly.
- The Arduino IDE is set up properly.
- Your code is successfully uploading and running on the board.
You do not need to fully understand the code yet. At this stage, the goal is to see something physical happen as a result of your program.
Most Arduino boards include a small built-in LED, usually connected to pin 13. This means you can run the Blink example without any external components.
Blink example code
void setup() {
  pinMode(13, OUTPUT);
}

void loop() {
  digitalWrite(13, HIGH);
  delay(500);
  digitalWrite(13, LOW);
  delay(500);
}
For a complete, step-by-step tutorial including wiring, code explanation, and uploading, follow our dedicated guide on How to Blink an LED with Arduino
Powering Arduino Safely
Arduino boards can be powered in several different ways. Choosing the correct power method is important for stability and safety.
The most common way to power an Arduino is through the USB port. This is suitable for learning testing and small projects.
- USB power from a computer or USB adapter
- External power through the barrel jack or VIN pin
- Regulated 5V supplied directly to the 5V pin
Each method has different voltage requirements. Supplying too much voltage or connecting power incorrectly can permanently damage the board.
As a beginner it is recommended to use USB power until you understand voltage limits and current requirements. External power is more suitable for standalone projects.
What You Can Build Next
Once you have uploaded your first program and understand the basics, you can start building real projects. Arduino can be used with many different types of components depending on what you want to create.
Most beginner projects fall into a few common categories. Each category builds on the core skills you have already learned:
- Sensors: temperature, distance, light, and motion
- Outputs: LEDs, buzzers, relays, and motors
- Displays: LCD and OLED screens
- Simple automation: alarms, timers, and controllers
A good next step is to pick one category and follow a complete project from start to finish. This helps reinforce wiring, coding, and troubleshooting skills.
Sensors
- Building an Arduino Temperature Monitor with DHT22 and 0.96" OLED Display
- Best Arduino Digital Temperature Sensors – DHT11 vs DHT22 vs BME280 vs DS18B20
- What is VL53L0X Time-of-Flight Distance Sensor – Advanced Guide
Displays & Games
- How to Build and Play JumpMan: A Fun Arduino LCD Game with I2C Interface
- How to Use a 16x2 LCD: Complete Tutorial
Exploring projects like these is the fastest way to turn your Arduino knowledge into real-world skills. Start with one project, experiment, and then try combining multiple components for more advanced creations!
Common Mistakes and Troubleshooting
Running into problems is a normal part of learning Arduino. Most issues beginners face are simple and easy to fix once you know what to check.
- Wrong board or port selected in the Arduino IDE
- Loose or incorrect wiring on the breadboard
- Using the wrong pin numbers in the code
- Power issues caused by insufficient or incorrect voltage
If a program does not work start by checking connections then confirm the correct board and port are selected. Reading error messages in the IDE carefully often points directly to the problem.
Do not assume your board is broken. In most cases the issue is a small wiring or configuration mistake.
Frequently Asked Questions
This section answers common questions beginners have when starting with Arduino. It is normal to feel unsure at first and most of these questions come up early in the learning process.
Is Arduino suitable for complete beginners
Yes Arduino is designed to be beginner friendly. You do not need prior experience with electronics or programming. Most people start by following simple examples and learn gradually as they build projects.
Do I need to know programming to use Arduino
No prior programming knowledge is required. Arduino code is simple and well documented and many examples are included with the IDE. You can learn the basics of programming as you go.
What programming language does Arduino use
Arduino uses a language based on C and C++. For beginners this mostly means writing simple commands and functions rather than complex software.
Arduino vs Raspberry Pi which should I choose
Arduino is best for controlling hardware like sensors motors and LEDs. Raspberry Pi is a small computer that runs an operating system. For learning electronics and physical projects Arduino is usually the better starting point.
Arduino Uno vs Arduino Uno R4 which should I choose
The original Uno R3 is the cheapest and most widely supported option, and it is what almost every beginner tutorial is written for. The Uno R4 Minima and Uno R4 WiFi use a faster processor and more memory, with the WiFi version also adding built-in wireless. Either R4 board is a good choice if you already know you will want extra performance or WiFi down the track.
Can I damage my Arduino easily
Arduino boards are fairly robust but they can be damaged by incorrect wiring or applying too much voltage. Using USB power and double checking connections before powering the board greatly reduces risk.
How long does it take to learn Arduino
You can run your first program within minutes. Basic projects can be built within a few days. Learning more advanced concepts depends on how complex your projects become.